August 04, 2012

So I've Been Doing Some Canning....


Not sure if you've heard, but a couple of weekends ago was National Can-It-Forward Day.  The exact purpose of this day is a little hazy to me so I took it as National Canning Day.  Is that bad?  Any-whoo, I woke up on Saturday morning and went straight to the Farmers Market.  My intention going into this day was to make some cherry, blueberry and raspberry jams.  The cherries we're on sale at my local market for $1.98/lb so I bought 10 lbs the previous day.  That left the blueberries and raspberries.  However, the first thing that I saw after I parked was a little old lady selling pickling cucumbers by the 5 gallon bucket for $10.  Pickles are something I haven't jumped into yet because I was under the impression that the cukes weren't ready yet.  Or so I thought.  At $10 for roughly 25 lbs, I could not pass that deal up.  So now I added pickles to the list of stuff to make.  Moving on with my venture, I found someone selling boatloads of green beans.  Dilly beans anyone??  I picked up 3 lbs of those while I was at it.  Blueberries were being sold at $1/pint but if you bought a case of 12 it was only $10.  Pick 'em up!  Raspberries were the only bummer of the day.  While the berries were 'a plenty, the prices were out of my budget.  Everyone wanted $5/pint for them and I needed 3 quarts worth.  In the end I would have been making a $30 jam.  So I opted to purchase 3 quarts of strawberries for $3 instead.  Much more budget friendly!  On the way out, I picked up some dill heads for the pickles then headed home to get my can on. 


Here's a recap of what was on the docket to make:


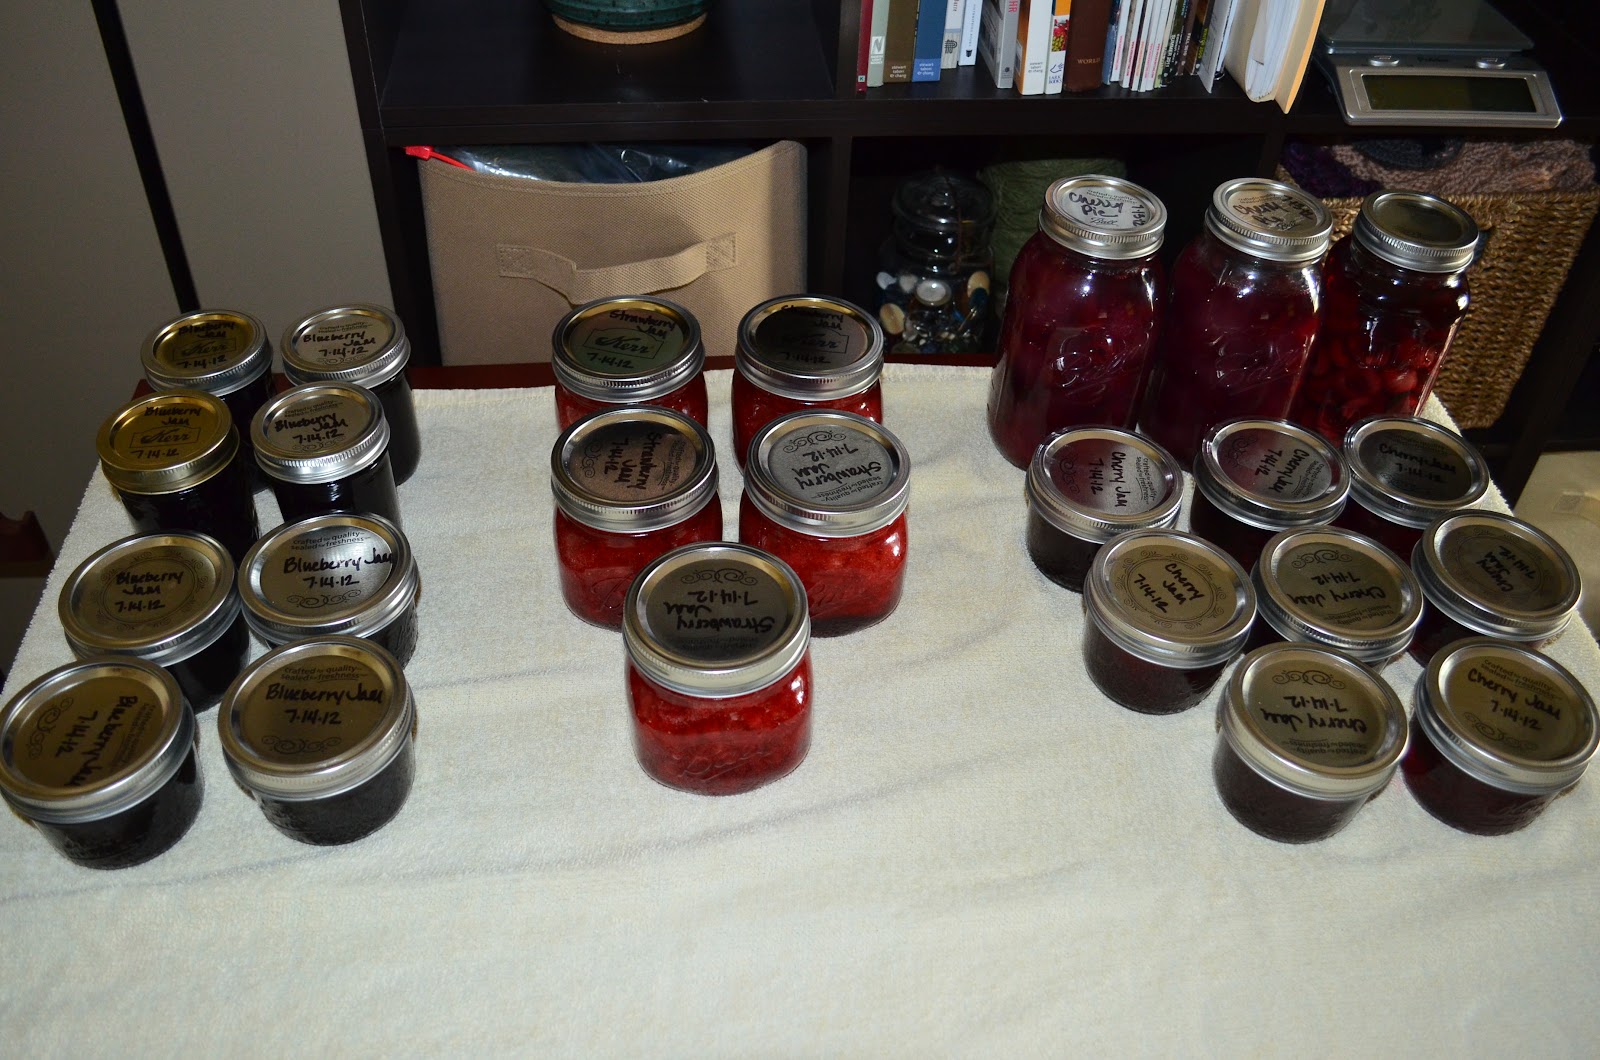
Something told me I was going to need more then one day to get this all done.  It took four, actually.  Day one, I made all the jams. 


Day 2 was the pie filling and vodka infusion (that was after a 2 hour cherry pitting spree, mind you).


Day 3, I made the relish along with the bread and butter pickles.


 Day 4 yielded  the dilly beans and dill pickles.   The majority of the recipes were found either on Pinterest, The Ball Complete Book of Home Preserving, or Food In Jars.  The dill pickles came to me from a family recipe which I will share with you today.  So let's get started, shall we?

Start by sterilizing 8 quart size wide-mouth jars in a large pot.  Mine only holds 4 at a time, so I had to do this in batches.  In a small sauce pan, simmer the lids.  Next, you'll need 10 lbs of pickling cucumbers.  Give them a good washing to remove any dirt.  Chop off the ends of the cukes and either slice into quarters or into sandwich slices using a mandolin.


Once I reached the bottom of the barrel, I noticed that I had some mini's in there so I made a jar of little guys that were left unsliced (but still with the ends removed). 


In a separate pot, bring 4 cups of white vinegar, 8 cups of water and 1 cup of canning salt to a boil.


Remove the jars from the water bath and pack each one with the sliced cucumbers along with 2 garlic cloves, 2-4 heads of dill and 2-6 dry red pepper pods(depending on the level of spice you like). 


At the top of each jar, place 1 grape leaf.


The grape leaves are to ensure you get a crispy pickle.  Not all grocery stores carry them, but if they do then you will most likely find them in the condiment isle near the olives. 


Fill the jars with the vinegar solution leaving 1/2" headspace at the top. 


Tap each jar on a towel to remove any air bubbles and wipe the rims of each with a clean cloth before placing the lids and rings on.  Process in a boiling water bath for 10 minutes.  Remove from heat, uncover and leave for another 5 minutes.  The only downer is that you have to wait 6-8 weeks to taste the finished product.
Processed vs. Unprocessed

Spicy Dill Pickles

10 Lbs pickling cucumbers
16-32 dill heads
16-48 dry red pepper pods
16 garlic cloves
8 grape leaves
8 cups water
4 cups white vinegar
1 cup canning salt
8 wide mouth quart jars

Sterilize the jars in a large pot.  In a small sauce pan, simmer the lids.  Wash the cucumbers to remove any dirt.  Chop off the ends of the cukes and slice into quarters.  In a separate pot, bring 4 cups of white vinegar, 8 cups of water and 1 cup of canning salt to a boil.  Remove the jars from the water bath and pack each one with the sliced cucumbers along with 2 garlic cloves, 2-4 heads of dill and 2-6 dry red pepper pods(depending on the level of spice you like).  At the top of each jar, place 1 grape leaf.  Fill the jars with the vinegar solution leaving 1/2" headspace at the top.  Tap each jar on a towel to remove any air bubbles and wipe the rims of each with a clean cloth before placing the lids and rings on.  Process in a boiling water bath for 10 minutes.  Remove from heat, uncover and leave for another 5 minutes.  Store in a dark place for 6-8 weeks.


June 04, 2012

Blue Cheese & Bacon Potato Salad

In my house, potato salad is a summertime staple.  However, I really hate the stuff that you buy at the grocery store.  I can't think of one instance where I've ever said "mmmm, that's good!" to the store bought stuff.  Growing up, my grandma always made hers from scratch and I've never found a comparison that even comes close.  Since then, I've been a firm believer in making my own.  There just is no other way to do it.  Over the years I've gotten pretty darn good at perfecting her recipe, but two summers ago I decided to try something new.  So I came up with my Blue Cheese & Bacon Potato Salad recipe.  It takes a little bit of time to prepare, but it is so worth it in the end.  Not to toot my own horn, but everyone (and I mean everyone) who has tried this salad has said it was the best potato salad they've ever eaten.  With compliments like those, I have no problem putting in the time to make it for my favorite people.  We had our friend, Andy over on Sunday evening and while the hubby was busy smoking up some of his famous baby back ribs I whipped up a batch of tater salad. 


The great thing about this recipe is that it's very forgiving.  The quantities used don't have to be precise; it's all about adding things "to taste".  So with that said, I will tell you how I make mine, but feel free to fudge with the amounts as you go if you'd like more or less of something.

I start with scrubbing 3 lbs of  red potatoes, leaving the skins on (if you want them off, we'll do that later).  Place them in a large pot filled with water leaving at least 2 inches at the top. 


Cook over medium-high heat until they are "fork tender", meaning once you stick a fork through them and it doesn't feel like they are still raw in the middle then they are ready to be drained.  Just make sure you don't cook them to the point where they are so soft that they are falling apart.  Drain the potatoes and put them back in the pot, fill it with cold water along with a couple of ice cubes so they will cool down quickly. 

Meanwhile, in another pot, make 6-8 hard boiled eggs.  A good rule of thumb would be to add 2-3 eggs per pound of potatoes.  If you've never hard boiled eggs before, it's very easy.  Let your eggs sit at room temp for at least 30 minutes so they don't crack once they hit the water.  Bring a pot of water up to a boil and using a spoon, very carfully place your eggs in the water (being very careful not to let them drop).  Turn the heat down to medium and cover the eggs for 15 minutes.  You want your water simmering, not boiling for this time.  When the 15 minutes are up, drain the water and fill the pot back up with cold water.  Let the eggs sit in the water until they've cooled.

Next up is the bacon.  Cut 8 strips of your favorite thick cut bacon in to bite size pieces. 


Cook over medium high heat in a saute pan until they are to your preferred level of crispiness.  Place the bacon on a plate lined with a paper towel to let the grease drain when it's done. 


Now it's time to let everyone get acquainted with each other.  Once the potatoes have cooled, you have a decision to make.  Skins or no skins?  It's really just personal preference and I've made both versions which were equally delicious.  If you choose to have no skins, now would be the time to peel them.  For this batch, I decided to leave mine on.  Chop the potatoes into small cubes and place them into a large bowl. 


Next, peel your cooled eggs and chop into small pieces.  If you have one of these handy egg cutters, use it.


Major time saver this thing is, and it makes your eggs all uniform in size.  It's all about equality people.  Add the eggs to the potatoes along with the bacon.  Now, take 5 scallions and slice them into thin pieces.  You'll want about 3 tablespoons total. 


Do the same with some chives.  Save some if you want to sprinkle them over the top when your done for presentation purposes. 


Measure out roughly 1 1/2 tablespoons of white wine vinegar. 


Be careful when adding this.  There is a fine line of pouring too much so all you taste is the vinegar.  Yuck.  If you're concerned, start with a small amount and add more as you go.  Next, add 1 1/2 tablespoons each of garlic powder and onion powder along with black pepper to taste.   Finally, it's time for the blue cheese dressing.  I highly recommend you don't skimp on this part and pop for the good stuff.  Or better yet, make your own.  Either way, make sure it has blue cheese chunks in it.  You'll thank me later. 


The thing with the dressing is that it's all "to taste" at this point.  I've made batches where I've only used half the bottle and it was great.  For this batch, I ended up using the entire thing.  Like with the vinegar, start small and add as you go.  You want the dressing to be one of the flavor components, not the only thing you taste. 


Once you have all the ingredients in the bowl, carefully mix everything together.  To do this, run your spoon down the side of the bowl to the bottom and pull the ingredients up to the top.  This is the best way to ensure you don't mash the crap out of the potatoes.  Move the salad to an airtight container and let it sit in the refrigerator for at least two hours.  This is also a great one to make a day ahead of time.  Once you're ready to serve, add some of the reserved chopped chives to the top and viola!  The best potato salad you've ever had.


Blue Cheese & Bacon Potato Salad

3 lbs red potatoes
6-8 hard boiled eggs
8 strips thick cut bacon, cut up
3 T scallions, sliced thin
3 T chives, chopped
1 1/2 T white wine vinegar
1 1/2 T onion powder
1 1/2 T garlic powder
black pepper, to tase
1 bottle chunky blue cheese dressing

In a large pot, cook the potatoes to "fork tender".  Drain the water and fill pot with cold water and some ice cubes.  Meanwhile, in a saute pan, cook the bacon and let drain on a plate lined with paper towels.  Once the potatoes are cooled, cut into cubes and place in a large bowl, with the drained bacon.  Peel and chop the eggs, place in the bowl.  Add all the remaining ingredients except for the dressing.  Start by pouring in 1/2 the bottle of dressing and mix well being careful not to mash the potatoes.  Do a taste test and add more dressing if needed.  Place in an airtight container and refrigerate for at least 2 hours.

May 24, 2012

Turkey Meatballs

In my last post I talked about how we like to buy meat in bulk when its on sale to store in our freezer for later use.  After the last go-round we had to do some shifting to make room for the new stuff and I came across the ground turkey that has been in there for about 4 months now. 


We bought it when it was on sale for $0.98 each and from previous experiences we knew that this type of ground turkey did not prepare well into turkey burgers because they ended up being a mushy mess.  It makes pretty good lasagna, but the turkey does come out a little on the dry side.  I wanted to try something new.  The hubs and I have had a bug up our butts lately about making spaghetti so the lightbulb went off in my head to make some turkey meatballs!  Josh's grandma is the meatball master and she's taught me a thing or two over the years about how to make them right.  So lets get started, shall we?

We're going to make 2 pounds worth so take your two pounds of turkey and put it in a large bowl.  Add to that 2 Tbls Worcestershire, 1 Tbls hot sauce, 1 egg, 6 cloves of garlic, 1 small onion, 2 Tbls fresh parsley, 1 Tbls fresh oregano, 2 tsp ground pepper, and a 1/2 cup of panko crumbs. 


Notice how there's no salt in there?  Turkey is pretty salty on its own and with the addition of the Worcestershire and hot sauce, you've got the sodium covered.  Now if you want to be dainty, go ahead and mix this with a large spoon until well blended.  Or, you could go the easy route and get in there with your hands to mix it all up. 


This should only take about 10 seconds.   Meanwhile, over on your stove, place a large shallow pan over medium to medium-high heat.  Add 2 Tbls unsalted butter and 2 Tbls canola oil until the butter is melted.  You can do just canola oil if you'd like to keep this on the healthier side, but I feel like the butter adds a yummy flavor component.  By the way, your pan is too hot if your butter starts turning brown.  If this happens, just turn the heat down a bit and keep on truckin'.  No need to start over.  I use a small ice cream scooper to measure out my meatballs and roll them in my hand to form them but you can use whatever works best for you. 


The great thing about these is that you can make your balls as big or small as you want.  Just make sure they're cooked all the way through in the end.  Once your butter is melted and the oil is hot, drop the meatballs one by one into the pan.  You'll know it's time to flip them when they look like they're almost cooked through to the top.


Each side will take about 3-5 minutes depending on how big you made your balls. 


When they seem like they're done cooking, take one and place it on a plate lined with a few paper towels.  Cut it down the middle and if there's no pink left in them then you've successfully made meatballs.  Take the rest out and put on the plate to cool down and drain some of the excess oil. 


From here, you can drop them right into your marinara sauce, eat them by themselves, or put them back in your freezer for later use.


Since we used the fresh herbs to make these, they come out tasting light and delicious.  They're pretty cheap too!  Like I said, I got the turkey for $1.96, I used about $0.50 worth of panko, the herbs cost me $1.50 (but if you've got your garden going they would be much cheaper), and as for the rest of the ingredients, we'll round up and figure they cost about $2.00 for the amounts we used.  So for under $6.00 I made about 30 meatballs.  If I'd waited another month and used my own herbs, these only would have cost about $4.50.  Either way, they're budget friendly!

Turkey Meatballs

2 lbs ground turkey
2 Tbls Worcestershrire
1 Tbls hot sauce (just use your favorite)
1 egg
6 garlic cloves, minced
1 small onion, minced
2 Tbls fresh parsley, chopped
1 Tbls fresh oregano, chopped
2 tsp fresh ground pepper
1/2 cup panko crumbs
2 Tbls unsalted butter
2 Tbls canola oil

Add all the ingredients except the butter and oil to a large bowl.  Mix well.  In a large shallow pan over medium to medium-high heat, add the butter and oil.  Once the butter has melted start forming the meatballs and drop them one by one into the oil.  Cook on each side for about 3-5 minutes.  Cut one in half to see if there's any pink left in the middle.  If there isn't then remove the meatballs and place them on a plate lined with paper towels to cool.

May 21, 2012

A Very Productive Day

I had a great weekend!  It really was one for the record books.  It kicked off on Friday night with the hubby and I having a date night at one of our favorite sushi joints here in town and headed to Redbox to rent The Descendants to watch at home.  Just what both of us needed after a long week.  Saturday was a day filled with family as there was a wedding reception on Josh's side that was capped off with dinner and drinks at his sisters house.  But it was Sunday that took the cake.  I very rarely get the hubby at home for an entire day, much less him not taking a big chunk of time when he's in the office working on articles or replying to e-mails so I was excited!

We woke up early Sunday morning and hit the farmers market with my mother-in-law in tow.  We got all of our plants for this years garden plus spinach, chives, bacon and a yummy garlic cheese for the evenings dinner.  After a quick stop to Home Depot for some dirt, it was time to get to planting.  We will be moving at the end of the summer, so I'm a little hesitant to plant anything in my actual garden this year considering I may not get to enjoy the fruits of my labor before they ripen.  So that leaves us with container gardening which almost works out better because now we have the ability to move the plants around so they have full sun at all times instead of just the afternoon sun they would have if they were sitting in the container garden in the back yard.  Here's a rundown of what we planted.

1 - Brandywine Heirloom Tomato


2 - Jalapeno Peppers
4 - Cayenne Peppers
2 - Bhut Jolokia Peppers (aka The Ghost Pepper)
1 - Thai Pepper
2 - Habenero Pepper (red and orange)
1 - Chiltepin Pepper


Thyme, Dill, Oregano and Chives


Mint, Rosemary, Parsley and Basil


Looking back, I'm kinda bummed I didn't buy the stevia plant that I found because I'm interested in what I could do with it since its a non-caloric sugar substitute.  The good thing is that I can always go back! 

Next up was a quick stop at the grocery store to return our movie and pick up a few things for dinner.  When we got there we noticed there was a pretty good sale on meat happening, so we took this as a good opportunity to stock up on pork chops and chicken breasts.  For a family on a budget like ourselves, when we see good deals on meat we buy in bulk and put it all in our freezer that we keep in the basement.  Once back home, the hubby was already working on a guajillo pepper marinade for the tenderloin tips we were making for dinner and we had enough to do the pork chops and a few chickens as well.   


Both of us are borderline obsessed with the FoodSaver that we bought a few months back so we were pretty excited to let that freak flag fly for a bit. 


In total, we got 12 pork chops for $13.01 or 1.08/each and 21 chicken breasts for $16.89 or $0.85/each.  Can't beat that with a stick! 


But wait, it gets better because I took a pack of the chicken and made some more of the chicken cordon bleu's that I blogged about last month. Here's another fun price breakdown of those:

7 chicken breasts - $0.85 each for $5.95
1/2 lb deli ham - $3.92
1/2 pack of swiss cheese $1.00
1/2 box of panko breading - $1.00
3 eggs and some flour - about $0.50

For a grand total of $12.37 I made 7 cordon bleu's at $1.77 each! That's alot cheaper than you can buy them for in the store and they are healthier since they aren't full of preservatives. Naturally, those got freezer packed too. I love that thing.

.
All in all, it was a perfect weekend and I cherished every moment of it since next weekend is bass opener so I will be The Fishermans Widow once again.  If the weather is nice, I'm going to be re-staining our dresser so keep your fingers crossed!

May 07, 2012

Strawberry-Blackberry Jam

Spring has sprung here in Minnesota and I have suddenly turned into a canning junkie.  As promised in my last post, I'm going to share with you my latest canning endeavor of Strawberry-Blackberry jam.  My recent trip to the Farmers Market yielded 3 pounds of strawberries for $1 a piece.  At those prices, I knew there would be more jam in my future although, I really wanted to add a new flavor component.  My local grocery store ad informed me that 2 - 6oz containers of blackberries were on sale this week for $4.  I searched high and low for a strawberry-blackberry jam recipe but didn't come up with much.  So it was starting to look like I would need to come up with something on my own.  Canning is a very finicky thing and the wrong sugar/fruit/acid levels can really mess things up for you so I needed to be careful.  I already had a great strawberry jam recipe and I found some triple berry jam recipes (that for some reason excluded strawberries), so I attempted to combine the two into a new workable one.  One major detail still needed to be ironed out between me and the hubby.  When it came to the blackberries - seeds or no seeds? 


We both decided to make it seedless so the first step would be straining the blackberries.  I took a medium size bowl and placed my mesh strainer over it.  Then, I poured the berries into the strainer about 1/2 cup at a time and using a wooden spoon, started mashing the crap out of them. 


This took several minutes per batch and could tell all the juices had been rendered once the remaining berries had turned into a paste like consistency.  I continued on with the rest of the blackberries until all had been mashed.  Since this was my first time at this, I wasn't sure how much juice I could get out of them.  My goal for this recipe was to use 2 cups blackberry juice and 4 cups of  mashed strawberries for a total of 6 cups of fruit.  Unfortunately,  I only got 1 cup of juice out of 12 ounces so I needed to make up for the remaining cup using strawberries.


Each pound of mashed strawberries was producing about 2 cups each. 


Once I had my strawberries hulled and mashed and my blackberry juice ready, I poured it all into my pot and added 4 Tablespoons of fresh lemon juice.


Along with 6 Tablespoons of powdered pectin (or 1 box).


 I should add that at this point, I already had 11 half pint jars and lids sterilizing on the stove as well. For more on that visit this post.  Bring the fruit mixture up to a rapid boil.

 Add 7 cups of sugar.  


Once you get the mix going on the stove things start to happen pretty quickly so it's easiest if you already have the sugar measured out in another bowl.  When all the sugar has dissolved but the mix is not quite boiling again, add 2 Tablespoons of Grand Marnier. 


Let the mix come to a rapid boil that cannot be stirred down.  Keep stirring for 1 1/2 minutes longer.  Remove from heat and let it sit for about 5 minutes  This resting time will allow for the mashed fruit to stay floating in your jars as opposed to all the fruit rising to the top.


Using a wide mouth funnel and a ladle, carefully scoop the jam mix and pour into the 11 very hot jars.  Take a knife or the wooden stick that often comes with canning kits and scrape along the inside of each jar to eliminate any air bubbles. 


Place the lids on the center of each jar and lightly screw on it's ring. 


My canning rack only holds 5 half pint jars at a time, so I had to do 2 water bath sessions and I left the 11th jar as my refrigerator jar. 


Process each batch for 10 minutes in water that has a hard rolling boil and covers the jars by at least 2 inches.  Turn off the heat and let sit in the water for an additional 5 minutes.  Remove the canning rack from the water and using your jar lifters, carefully place them on a clean dry towel.  Once they are out of the water and on the towel, do not touch them for at least 24 hours!  Almost immediately you will start to hear the wonderful "ping" of the lids that informs you of a successful canning experience.  It can take up to a few hours after removal from the water bath to hear all the pings.  After 24 hours, date and label the lids then place the jars in a cool dry place for future use. 


Strawberry Blackberry Jam

11 - 8oz canning jars
2 cups blackberries, strained (about 4 - 6oz containers)
4 cups strawberries, hulled & sliced (about 2 - 2lb containers)
4 Tbls fresh lemon juice
6 Tbls (or 1 box) powdered pectin
7 cups sugar
2 Tbls Grand Marnier

  1. Fill your canning pot until it is 2/3 full of water.  Place on the stove and bring to a simmer.  Add the clean canning jars and leave until you are ready to fill them with jam.  Do the same in a small saucepan to process the lids.  It's not necessary to do this with the rings.
  2.  For seedless - mash the blackberries in a mesh strainer over a bowl with a spoon to render the juices and measure out 2 cups of juice.  For seeds -  mash the blackberries and measure 2 cups.  Pour into a large pot.
  3. Mash 4 cups of strawberries and place into pot.
  4. To the pot, add the fresh lemon juice powdered pectin.
  5. Stir all ingredients together and place on stove over high heat.
  6. Stir contuiously until the mix begins to boil.
  7. Add the sugar, stirring constantly
  8. Once the sugar has dissolved, but has not yet begin to boil again, add the Grand Marnier
  9. Bring mix up to a violent boil that cannot be stirred down and continue stirring for another 1 1/2 minutes.
  10. Remove from heat and let sit for 5 minutes.  
  11. Skim any foam that forms on the jam
  12. Using a pair of tongs, remove the canning jars from the water and place on a clean dry tea towel.
  13. Using a wide mouth funnel and ladle, scoop the jam into each jar being careful not to spill.  Leave at least 1/4 inch of head space at the top of each jar.
  14. Using a knife or wooden stick, scrape the insides of each jar to remove any bubbles.
  15. Take the magnetic lid lifters and place a lid on the center of each jar.  Lightly screw a ring around each one.  Do not screw it on too tight as air still needs to escape during the canning process.
  16. Place the jars in the canning rack and submerse in the canning pot  in boiling water, making sure there is at least 2 inches of water covering the jars.
  17. Keep the water at a rolling boil for 10 minutes.  
  18. Turn off the heat and continue to process for 5 minutes.
  19. Remove the canning rack and using the jar lifters, place the jars back on the clean dry towel.
  20. Continue this process for any remaining jars you have.
  21. DO NOT TOUCH the jars for 24 hours.
  22. Label the jars making sure to add the date and store in a cool dry place for up to one year.