
We both decided to make it seedless so the first step would be straining the blackberries. I took a medium size bowl and placed my mesh strainer over it. Then, I poured the berries into the strainer about 1/2 cup at a time and using a wooden spoon, started mashing the crap out of them.
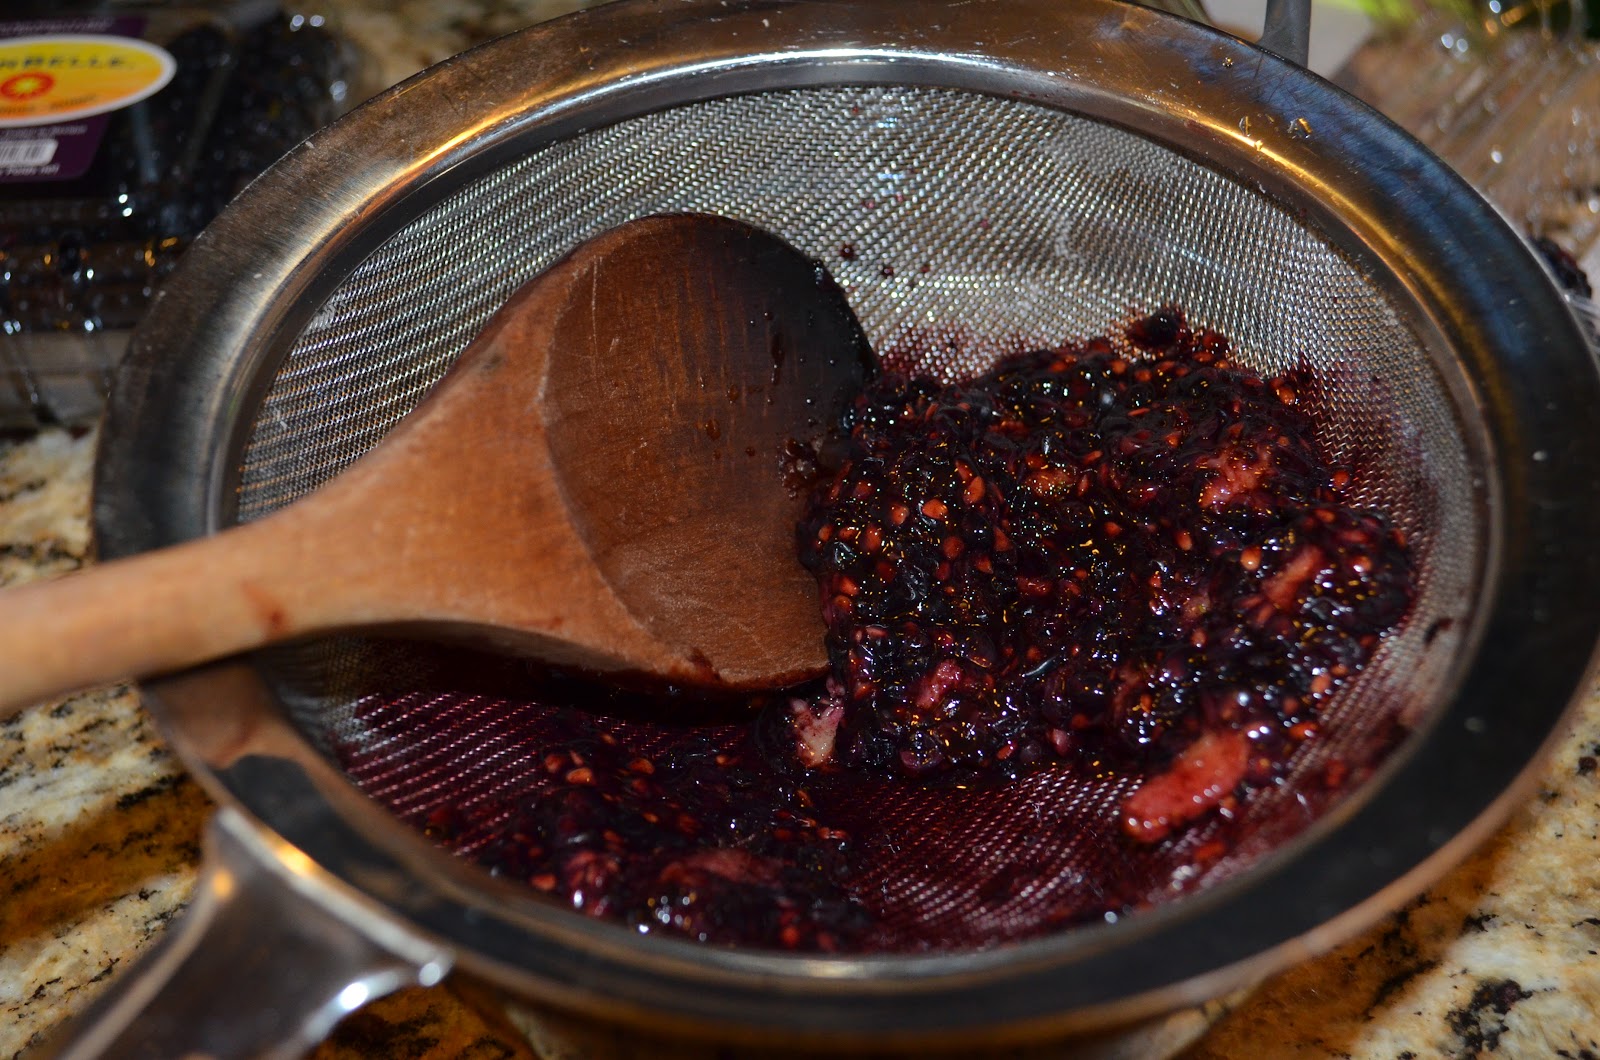
This took several minutes per batch and could tell all the juices had been rendered once the remaining berries had turned into a paste like consistency. I continued on with the rest of the blackberries until all had been mashed. Since this was my first time at this, I wasn't sure how much juice I could get out of them. My goal for this recipe was to use 2 cups blackberry juice and 4 cups of mashed strawberries for a total of 6 cups of fruit. Unfortunately, I only got 1 cup of juice out of 12 ounces so I needed to make up for the remaining cup using strawberries.

Each pound of mashed strawberries was producing about 2 cups each.

Once I had my strawberries hulled and mashed and my blackberry juice ready, I poured it all into my pot and added 4 Tablespoons of fresh lemon juice.

Along with 6 Tablespoons of powdered pectin (or 1 box).


I should add that at this point, I already had 11 half pint jars and lids sterilizing on the stove as well. For more on that visit this post. Bring the fruit mixture up to a rapid boil.


Once you get the mix going on the stove things start to happen pretty quickly so it's easiest if you already have the sugar measured out in another bowl. When all the sugar has dissolved but the mix is not quite boiling again, add 2 Tablespoons of Grand Marnier.

Let the mix come to a rapid boil that cannot be stirred down. Keep stirring for 1 1/2 minutes longer. Remove from heat and let it sit for about 5 minutes This resting time will allow for the mashed fruit to stay floating in your jars as opposed to all the fruit rising to the top.

Using a wide mouth funnel and a ladle, carefully scoop the jam mix and pour into the 11 very hot jars. Take a knife or the wooden stick that often comes with canning kits and scrape along the inside of each jar to eliminate any air bubbles.

Place the lids on the center of each jar and lightly screw on it's ring.

My canning rack only holds 5 half pint jars at a time, so I had to do 2 water bath sessions and I left the 11th jar as my refrigerator jar.

Process each batch for 10 minutes in water that has a hard rolling boil and covers the jars by at least 2 inches. Turn off the heat and let sit in the water for an additional 5 minutes. Remove the canning rack from the water and using your jar lifters, carefully place them on a clean dry towel. Once they are out of the water and on the towel, do not touch them for at least 24 hours! Almost immediately you will start to hear the wonderful "ping" of the lids that informs you of a successful canning experience. It can take up to a few hours after removal from the water bath to hear all the pings. After 24 hours, date and label the lids then place the jars in a cool dry place for future use.

Strawberry Blackberry Jam
11 - 8oz canning jars
2 cups blackberries, strained (about 4 - 6oz containers)
4 cups strawberries, hulled & sliced (about 2 - 2lb containers)
4 Tbls fresh lemon juice
6 Tbls (or 1 box) powdered pectin
7 cups sugar
2 Tbls Grand Marnier
- Fill your canning pot until it is 2/3 full of water. Place on the stove and bring to a simmer. Add the clean canning jars and leave until you are ready to fill them with jam. Do the same in a small saucepan to process the lids. It's not necessary to do this with the rings.
- For seedless - mash the blackberries in a mesh strainer over a bowl with a spoon to render the juices and measure out 2 cups of juice. For seeds - mash the blackberries and measure 2 cups. Pour into a large pot.
- Mash 4 cups of strawberries and place into pot.
- To the pot, add the fresh lemon juice powdered pectin.
- Stir all ingredients together and place on stove over high heat.
- Stir contuiously until the mix begins to boil.
- Add the sugar, stirring constantly
- Once the sugar has dissolved, but has not yet begin to boil again, add the Grand Marnier
- Bring mix up to a violent boil that cannot be stirred down and continue stirring for another 1 1/2 minutes.
- Remove from heat and let sit for 5 minutes.
- Skim any foam that forms on the jam
- Using a pair of tongs, remove the canning jars from the water and place on a clean dry tea towel.
- Using a wide mouth funnel and ladle, scoop the jam into each jar being careful not to spill. Leave at least 1/4 inch of head space at the top of each jar.
- Using a knife or wooden stick, scrape the insides of each jar to remove any bubbles.
- Take the magnetic lid lifters and place a lid on the center of each jar. Lightly screw a ring around each one. Do not screw it on too tight as air still needs to escape during the canning process.
- Place the jars in the canning rack and submerse in the canning pot in boiling water, making sure there is at least 2 inches of water covering the jars.
- Keep the water at a rolling boil for 10 minutes.
- Turn off the heat and continue to process for 5 minutes.
- Remove the canning rack and using the jar lifters, place the jars back on the clean dry towel.
- Continue this process for any remaining jars you have.
- DO NOT TOUCH the jars for 24 hours.
- Label the jars making sure to add the date and store in a cool dry place for up to one year.