January 17, 2013

Nothin' Like 40's and Muffins

This past weekend our very good friends Luanne and James came down to visit us from back home.


Their timing was perfect.  We had been having weather in the upper 40's, but the day they got here it was in the 60's.  From there, the temps kept climbing and didn't stop until it hit 74.  Temps that warm in January are foreign to this Minnesota girl so we were groovin' on it.  We spent the entire weekend outside seeing what good ole' Chatt Town had to offer and it was a blast.  We made friends with our local longhorns..


We had fried chicken and 40's at Champy's


Then burned off the calories by taking a hike around Point Park on Lookout Mountain.


And then we made some really bad decisions...


By the time the weekend was over, I was ready for the sofa and some comfort food.  I had some bananas that were on their way out so the decision was made to make my favorite yogurt muffins.  When I was a little girl, these are the muffins that my mom and I would make together whenever we were in the mood to bake something.  They are quick, simple, versatile and delicious.  Oh, and they're pretty healthy too considering there is no oil or butter anywhere in the recipe.  You start off by sifting together 1 1/2 cups flour, 2 tsp baking powder (make sure it's fresh), 1/2 tsp salt, 3/4 cup sugar and 1 tsp baking soda.


Next, gently stir in 2/3 cup vanilla yogurt and 2/3 cup milk.


Mix until just combined and then pick your fruit.  You can make these with cranberries, blueberries, apples or whatever fruit you have that needs to be used up.  Today my choice is bananas.  


Mash em' up good and mix them into the batter.  


Lightly grease a muffin tin and fill 3/4 full.


Sprinkle with cinnamon sugar.


Bake in a 400 degree oven for 18 minutes or until they pass the toothpick test.


Remove the muffins from the tin to cool on a rack.


They are that simple and soooo yummy.  They are moist in the middle that you don't even need butter to spread on them.

Yogurt Muffins

1-1/2 cups all purpose flour 
2 tsp baking powder
1/2 tsp salt
3/4 cup sugar
1 tsp baking soda
2/3 cup vanilla yogurt
2/3 cup skim milk
1/2 cup fruit (cranberries, chopped apple, blueberries, smashed bananas) 

In large mixing bowl, sift together dry ingredients.  Gently stir in yogurt and milk, blending just until moist.
 Gently stir in fruit.  Fill a lightly greased muffin tin to 3/4 full.  Lightly sprinkle muffin tops with cinnamon sugar before baking. 
Bake at 400 degrees for 18 minutes.  Makes approximately 12 muffins. 

January 01, 2013

Fish Tacos

Recently, my husband took a page from his wifes book and decided to do a blog post about the fish tacos we made the night before.  They were so good that I had to share the recipe here.  Take it away honey!

Blackened Crappie Fish Tacos

This is one of my all-time favorite good eats and one that requires zero guilt for enjoying. Crappie is a wonderful dish and ever since leaving Minnesota for the warmer climates and flowing water of the Tennessee River, I've traded in walleye for the ever popular crappie. Don't get it twisted, walleye's the BOMB but so is cold water crappie and these slabbers are stacking up in brush piles by the dozen. Even a diehard bass angler such as myself finds it a worthy stop for a quick few minutes. I'm out there anyway, may as well catch Bri and I some free dinner.


There's nothing wrong with the traditional up-north style crappie eating where we roll 'em in Shore Lunch and give 'em a good frying before opening up a can of beans and a bag of Old Dutch potato chips. Now being in the south and picking up on the home-style way of eating, there's also something special about deep frying these tasty filets smothered in beer batter, alongside some fresh made coleslaw, greens with pepper infused vinegar, jalapeno hush puppies and maybe even some rice and beans. Let's not forget a generous portion of Bri's homemade spicy chow chow all up on there! Son!!

With my upcoming tournament season right around the corner, I've been looking for better ways to eat by parlaying that with a healthy workout regimen. As I said before, I love taste but find taste is not something that I have to go without just to eat right and stay healthy. Learning to sub spice for sodium is a terrific way to enjoy true flavor and live right at the same time. Also finding ways to work around deep frying is beneficial too, but by all means you still got to live a little so everything in moderation.

Back to the tacos, after all that's why you're still reading. These are truly delicious, relatively healthy and a different all around way for you and your family to enjoy.

Here's what you'll need:

Blackened Crappie

1 lb. Fresh Crappie Filets
3 teaspoons Spanish Paprika
2 teaspoons Onion Powder
1 tablespoon Garlic Powder
1 tablespoon Black Pepper
2 teaspoons Ground Thyme
3 teaspoons Basil
1 Full Ground Dried Cayenne Pepper


Jalapeno Tarter

1 cup Mayo
1 tablespoon Pickle Relish (Bri's Homemade Relish if you're fortunate enough)
1 tablespoon Minced Onion
1 Diced Jalapeno fresh or pickled
1 teaspoon Tobasco Sauce or Tobasco Pepper Vinegar
2 tablespoons Lemon Juice
Pepper to taste


Corn Relish

1 Diced Roma Tomato
1 Diced Roasted Red Pepper
1 cup Frozen Corn or Grilled Corn
1 Fresh Diced Jalapeno
1/2 cup Diced Cilantro
Black Pepper to taste

You'll also want to choose between corn tortillas and flour tortillas. Corn are much healthier and are more authentic as well as less expensive, but no matter your taste, either will work. Just make sure they're the standard soft taco size. You'll also want 1 head of cabbage.

Preparation is simple! First Prepare your tarter and corn relish and place in fridge to unify. Pretty simple to understand, just mix those above ingredients together, it's self explanatory. If you're not following perhaps you should stick to simply carry-out.

The tacos are next and you'll want to put a little butter and/or olive oil and bring it to medium high heat. Roll crappie filets in a gallon ziplock with all above spices and shake until they're well covered. Place filets in oiled skillet and let cook until filets turn from a translucent raw look to a white and flaky look, flip every minute. Once cooked through, place in a cooking dish and put in oven at 400 degrees. At the same time, place your corn tortillas (only if their corn) in the same oven on a cookie sheet and flip after one side starts turning to a light brown. After tortillas are cooked to your liking pull both the tortillas and the filets out of the oven. This should only take several minutes with a preheated oven. Take a spatula or a wooden spoon and break up the crappie filets making a big ole' dish of torn up blackened fish.

Take your warmed tortillas and spread a little jalapeno tarter around, add a heaping spoon full of blackened crappie, top with corn relish and fresh chopped cabbage. Add a little Cholula Hot Sauce and/or cheese if you're like my wife, as well as a little squeeze of fresh lime or lemon. ENJOY!

New Beginnings

It's been a while since my last post and while I really don't have a excuse for why I've been absent for so long, I have had some big changes happening in my life.  The biggest one being that in September my husband and I packed up the dogs along with all of our stuff and moved south.  Tennessee to be exact.  With Josh taking the next big step in his career for the upcoming season, it only made sense to make the move and be closer to all the action.  I.Love.It.Here.  We found the perfect house to rent, I finally found a great job and we live in the place we've been dreaming about for the last five years.  Oh, and the kitchen is huge!  I have a cabinet to fit every dish, every appliance, every utinsil. I couldn't have imagined everything going as well as it has.  In the coming weeks, I'll be posting new recipes that I had been experimenting with during my period of unemployment. 

While the cooking around here has been a 'plenty, I've also been doing my fair share of knitting.  The cowl that I'm currently working on is the Cabernet Infinity Scarf.  I love the combination of cables and lace.  And it doesn't hurt that it's the color of a dreamsicle. 


I can't wait for it to be finished so I can wear it.  While the winters down here don't get nearly as cold as 'ol Minne, there is definately a nip to the air so this cowl paired with a light jacket is perfect. 

Along with the cowl, I've also been working on designing my own pillow pattern.  Not a huge project, but the perfect size for my first attempt.  Here's a sneak peek.


It's the perfect mix of compact yet challenging.  I'm going to do my best to have it done in the next few weeks, but I'm not entirely sure that's possible.  There are some birthdays and the impending birth of my new niece or nephew coming up so this one keeps getting pushed to the backburner.  Psh.  Knitting problems..

August 04, 2012

So I've Been Doing Some Canning....


Not sure if you've heard, but a couple of weekends ago was National Can-It-Forward Day.  The exact purpose of this day is a little hazy to me so I took it as National Canning Day.  Is that bad?  Any-whoo, I woke up on Saturday morning and went straight to the Farmers Market.  My intention going into this day was to make some cherry, blueberry and raspberry jams.  The cherries we're on sale at my local market for $1.98/lb so I bought 10 lbs the previous day.  That left the blueberries and raspberries.  However, the first thing that I saw after I parked was a little old lady selling pickling cucumbers by the 5 gallon bucket for $10.  Pickles are something I haven't jumped into yet because I was under the impression that the cukes weren't ready yet.  Or so I thought.  At $10 for roughly 25 lbs, I could not pass that deal up.  So now I added pickles to the list of stuff to make.  Moving on with my venture, I found someone selling boatloads of green beans.  Dilly beans anyone??  I picked up 3 lbs of those while I was at it.  Blueberries were being sold at $1/pint but if you bought a case of 12 it was only $10.  Pick 'em up!  Raspberries were the only bummer of the day.  While the berries were 'a plenty, the prices were out of my budget.  Everyone wanted $5/pint for them and I needed 3 quarts worth.  In the end I would have been making a $30 jam.  So I opted to purchase 3 quarts of strawberries for $3 instead.  Much more budget friendly!  On the way out, I picked up some dill heads for the pickles then headed home to get my can on. 


Here's a recap of what was on the docket to make:


Something told me I was going to need more then one day to get this all done.  It took four, actually.  Day one, I made all the jams. 


Day 2 was the pie filling and vodka infusion (that was after a 2 hour cherry pitting spree, mind you).


Day 3, I made the relish along with the bread and butter pickles.


 Day 4 yielded  the dilly beans and dill pickles.   The majority of the recipes were found either on Pinterest, The Ball Complete Book of Home Preserving, or Food In Jars.  The dill pickles came to me from a family recipe which I will share with you today.  So let's get started, shall we?

Start by sterilizing 8 quart size wide-mouth jars in a large pot.  Mine only holds 4 at a time, so I had to do this in batches.  In a small sauce pan, simmer the lids.  Next, you'll need 10 lbs of pickling cucumbers.  Give them a good washing to remove any dirt.  Chop off the ends of the cukes and either slice into quarters or into sandwich slices using a mandolin.


Once I reached the bottom of the barrel, I noticed that I had some mini's in there so I made a jar of little guys that were left unsliced (but still with the ends removed). 


In a separate pot, bring 4 cups of white vinegar, 8 cups of water and 1 cup of canning salt to a boil.


Remove the jars from the water bath and pack each one with the sliced cucumbers along with 2 garlic cloves, 2-4 heads of dill and 2-6 dry red pepper pods(depending on the level of spice you like). 


At the top of each jar, place 1 grape leaf.


The grape leaves are to ensure you get a crispy pickle.  Not all grocery stores carry them, but if they do then you will most likely find them in the condiment isle near the olives. 


Fill the jars with the vinegar solution leaving 1/2" headspace at the top. 


Tap each jar on a towel to remove any air bubbles and wipe the rims of each with a clean cloth before placing the lids and rings on.  Process in a boiling water bath for 10 minutes.  Remove from heat, uncover and leave for another 5 minutes.  The only downer is that you have to wait 6-8 weeks to taste the finished product.
Processed vs. Unprocessed

Spicy Dill Pickles

10 Lbs pickling cucumbers
16-32 dill heads
16-48 dry red pepper pods
16 garlic cloves
8 grape leaves
8 cups water
4 cups white vinegar
1 cup canning salt
8 wide mouth quart jars

Sterilize the jars in a large pot.  In a small sauce pan, simmer the lids.  Wash the cucumbers to remove any dirt.  Chop off the ends of the cukes and slice into quarters.  In a separate pot, bring 4 cups of white vinegar, 8 cups of water and 1 cup of canning salt to a boil.  Remove the jars from the water bath and pack each one with the sliced cucumbers along with 2 garlic cloves, 2-4 heads of dill and 2-6 dry red pepper pods(depending on the level of spice you like).  At the top of each jar, place 1 grape leaf.  Fill the jars with the vinegar solution leaving 1/2" headspace at the top.  Tap each jar on a towel to remove any air bubbles and wipe the rims of each with a clean cloth before placing the lids and rings on.  Process in a boiling water bath for 10 minutes.  Remove from heat, uncover and leave for another 5 minutes.  Store in a dark place for 6-8 weeks.


June 04, 2012

Blue Cheese & Bacon Potato Salad

In my house, potato salad is a summertime staple.  However, I really hate the stuff that you buy at the grocery store.  I can't think of one instance where I've ever said "mmmm, that's good!" to the store bought stuff.  Growing up, my grandma always made hers from scratch and I've never found a comparison that even comes close.  Since then, I've been a firm believer in making my own.  There just is no other way to do it.  Over the years I've gotten pretty darn good at perfecting her recipe, but two summers ago I decided to try something new.  So I came up with my Blue Cheese & Bacon Potato Salad recipe.  It takes a little bit of time to prepare, but it is so worth it in the end.  Not to toot my own horn, but everyone (and I mean everyone) who has tried this salad has said it was the best potato salad they've ever eaten.  With compliments like those, I have no problem putting in the time to make it for my favorite people.  We had our friend, Andy over on Sunday evening and while the hubby was busy smoking up some of his famous baby back ribs I whipped up a batch of tater salad. 


The great thing about this recipe is that it's very forgiving.  The quantities used don't have to be precise; it's all about adding things "to taste".  So with that said, I will tell you how I make mine, but feel free to fudge with the amounts as you go if you'd like more or less of something.

I start with scrubbing 3 lbs of  red potatoes, leaving the skins on (if you want them off, we'll do that later).  Place them in a large pot filled with water leaving at least 2 inches at the top. 


Cook over medium-high heat until they are "fork tender", meaning once you stick a fork through them and it doesn't feel like they are still raw in the middle then they are ready to be drained.  Just make sure you don't cook them to the point where they are so soft that they are falling apart.  Drain the potatoes and put them back in the pot, fill it with cold water along with a couple of ice cubes so they will cool down quickly. 

Meanwhile, in another pot, make 6-8 hard boiled eggs.  A good rule of thumb would be to add 2-3 eggs per pound of potatoes.  If you've never hard boiled eggs before, it's very easy.  Let your eggs sit at room temp for at least 30 minutes so they don't crack once they hit the water.  Bring a pot of water up to a boil and using a spoon, very carfully place your eggs in the water (being very careful not to let them drop).  Turn the heat down to medium and cover the eggs for 15 minutes.  You want your water simmering, not boiling for this time.  When the 15 minutes are up, drain the water and fill the pot back up with cold water.  Let the eggs sit in the water until they've cooled.

Next up is the bacon.  Cut 8 strips of your favorite thick cut bacon in to bite size pieces. 


Cook over medium high heat in a saute pan until they are to your preferred level of crispiness.  Place the bacon on a plate lined with a paper towel to let the grease drain when it's done. 


Now it's time to let everyone get acquainted with each other.  Once the potatoes have cooled, you have a decision to make.  Skins or no skins?  It's really just personal preference and I've made both versions which were equally delicious.  If you choose to have no skins, now would be the time to peel them.  For this batch, I decided to leave mine on.  Chop the potatoes into small cubes and place them into a large bowl. 


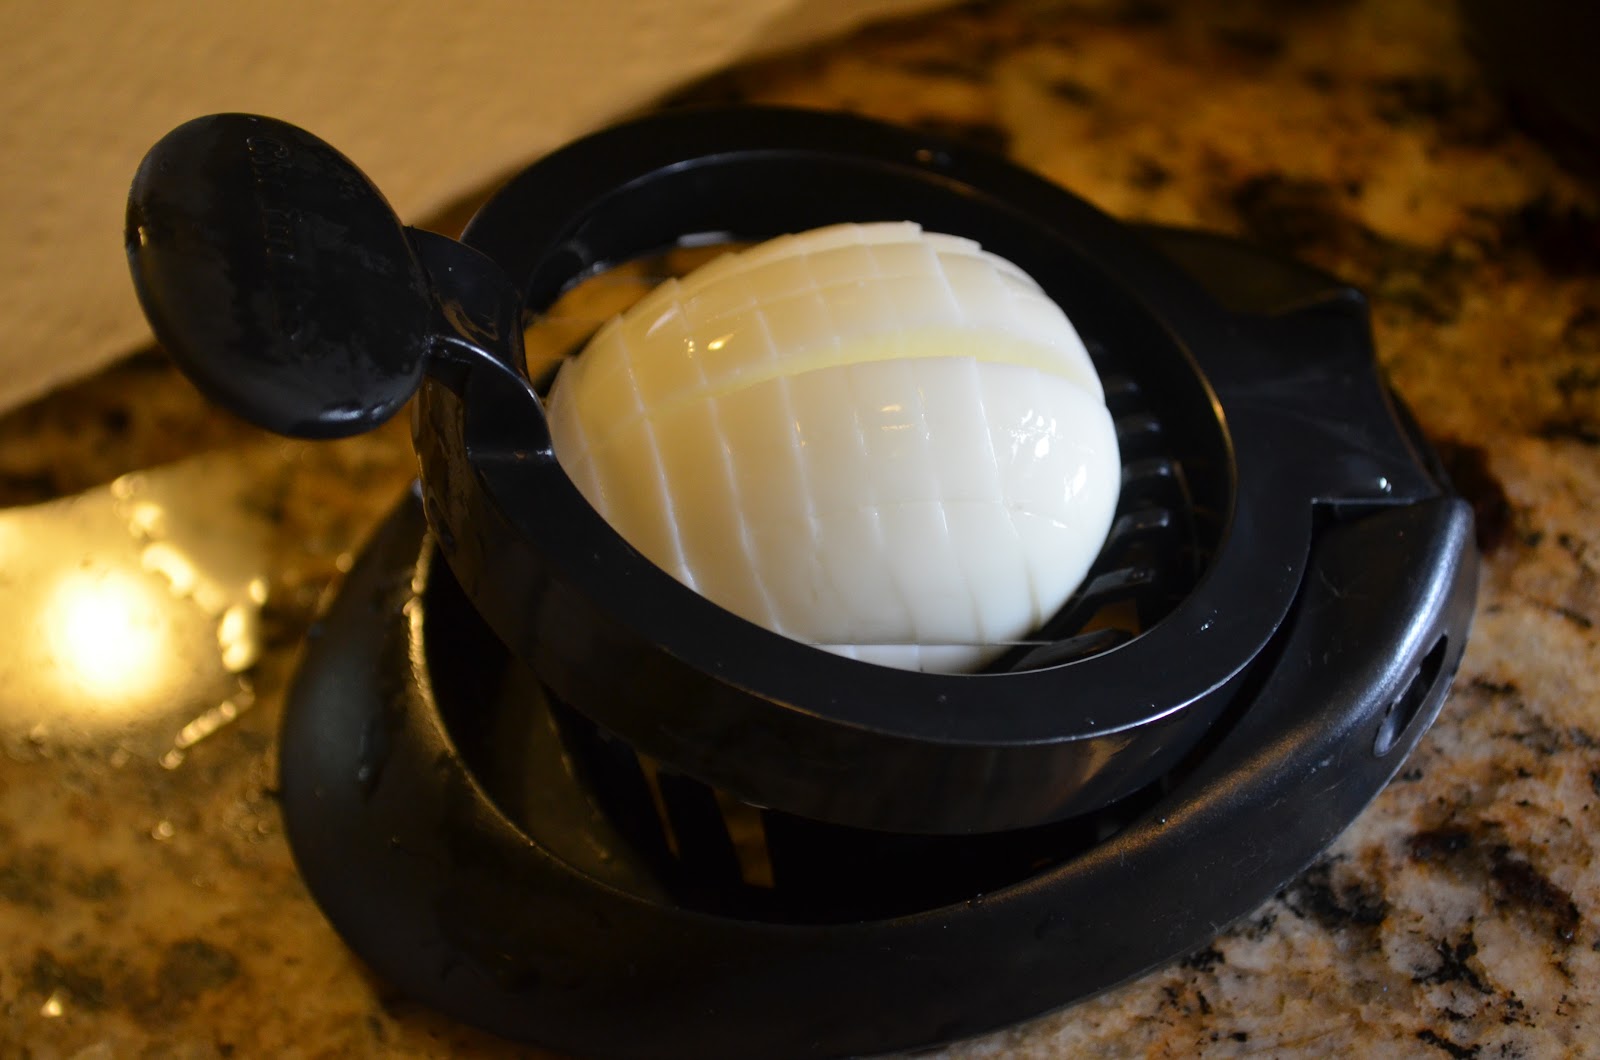
Next, peel your cooled eggs and chop into small pieces.  If you have one of these handy egg cutters, use it.


Major time saver this thing is, and it makes your eggs all uniform in size.  It's all about equality people.  Add the eggs to the potatoes along with the bacon.  Now, take 5 scallions and slice them into thin pieces.  You'll want about 3 tablespoons total. 


Do the same with some chives.  Save some if you want to sprinkle them over the top when your done for presentation purposes. 


Measure out roughly 1 1/2 tablespoons of white wine vinegar. 


Be careful when adding this.  There is a fine line of pouring too much so all you taste is the vinegar.  Yuck.  If you're concerned, start with a small amount and add more as you go.  Next, add 1 1/2 tablespoons each of garlic powder and onion powder along with black pepper to taste.   Finally, it's time for the blue cheese dressing.  I highly recommend you don't skimp on this part and pop for the good stuff.  Or better yet, make your own.  Either way, make sure it has blue cheese chunks in it.  You'll thank me later. 


The thing with the dressing is that it's all "to taste" at this point.  I've made batches where I've only used half the bottle and it was great.  For this batch, I ended up using the entire thing.  Like with the vinegar, start small and add as you go.  You want the dressing to be one of the flavor components, not the only thing you taste. 


Once you have all the ingredients in the bowl, carefully mix everything together.  To do this, run your spoon down the side of the bowl to the bottom and pull the ingredients up to the top.  This is the best way to ensure you don't mash the crap out of the potatoes.  Move the salad to an airtight container and let it sit in the refrigerator for at least two hours.  This is also a great one to make a day ahead of time.  Once you're ready to serve, add some of the reserved chopped chives to the top and viola!  The best potato salad you've ever had.


Blue Cheese & Bacon Potato Salad

3 lbs red potatoes
6-8 hard boiled eggs
8 strips thick cut bacon, cut up
3 T scallions, sliced thin
3 T chives, chopped
1 1/2 T white wine vinegar
1 1/2 T onion powder
1 1/2 T garlic powder
black pepper, to tase
1 bottle chunky blue cheese dressing

In a large pot, cook the potatoes to "fork tender".  Drain the water and fill pot with cold water and some ice cubes.  Meanwhile, in a saute pan, cook the bacon and let drain on a plate lined with paper towels.  Once the potatoes are cooled, cut into cubes and place in a large bowl, with the drained bacon.  Peel and chop the eggs, place in the bowl.  Add all the remaining ingredients except for the dressing.  Start by pouring in 1/2 the bottle of dressing and mix well being careful not to mash the potatoes.  Do a taste test and add more dressing if needed.  Place in an airtight container and refrigerate for at least 2 hours.